One of my favorite parts about spending time with other creative entrepreneurs is how much we are constantly learning from one another. Last month, while photographing for Alexandra from Heart Love Always in Captiva Island, Florida – we started talking about the potential of Pinterest and she shared one of her favorite secrets with me! Yesterday, Alexandra blogged about How to Make Your Blog Posts More Pinnable and it’s a must read for all Creative Entrepreneurs!
Today, I’m recapping how to create hidden images within your blog posts in order to optimize your content for Pinterest, as well as how it can be beneficial to photographers! Lets get started!
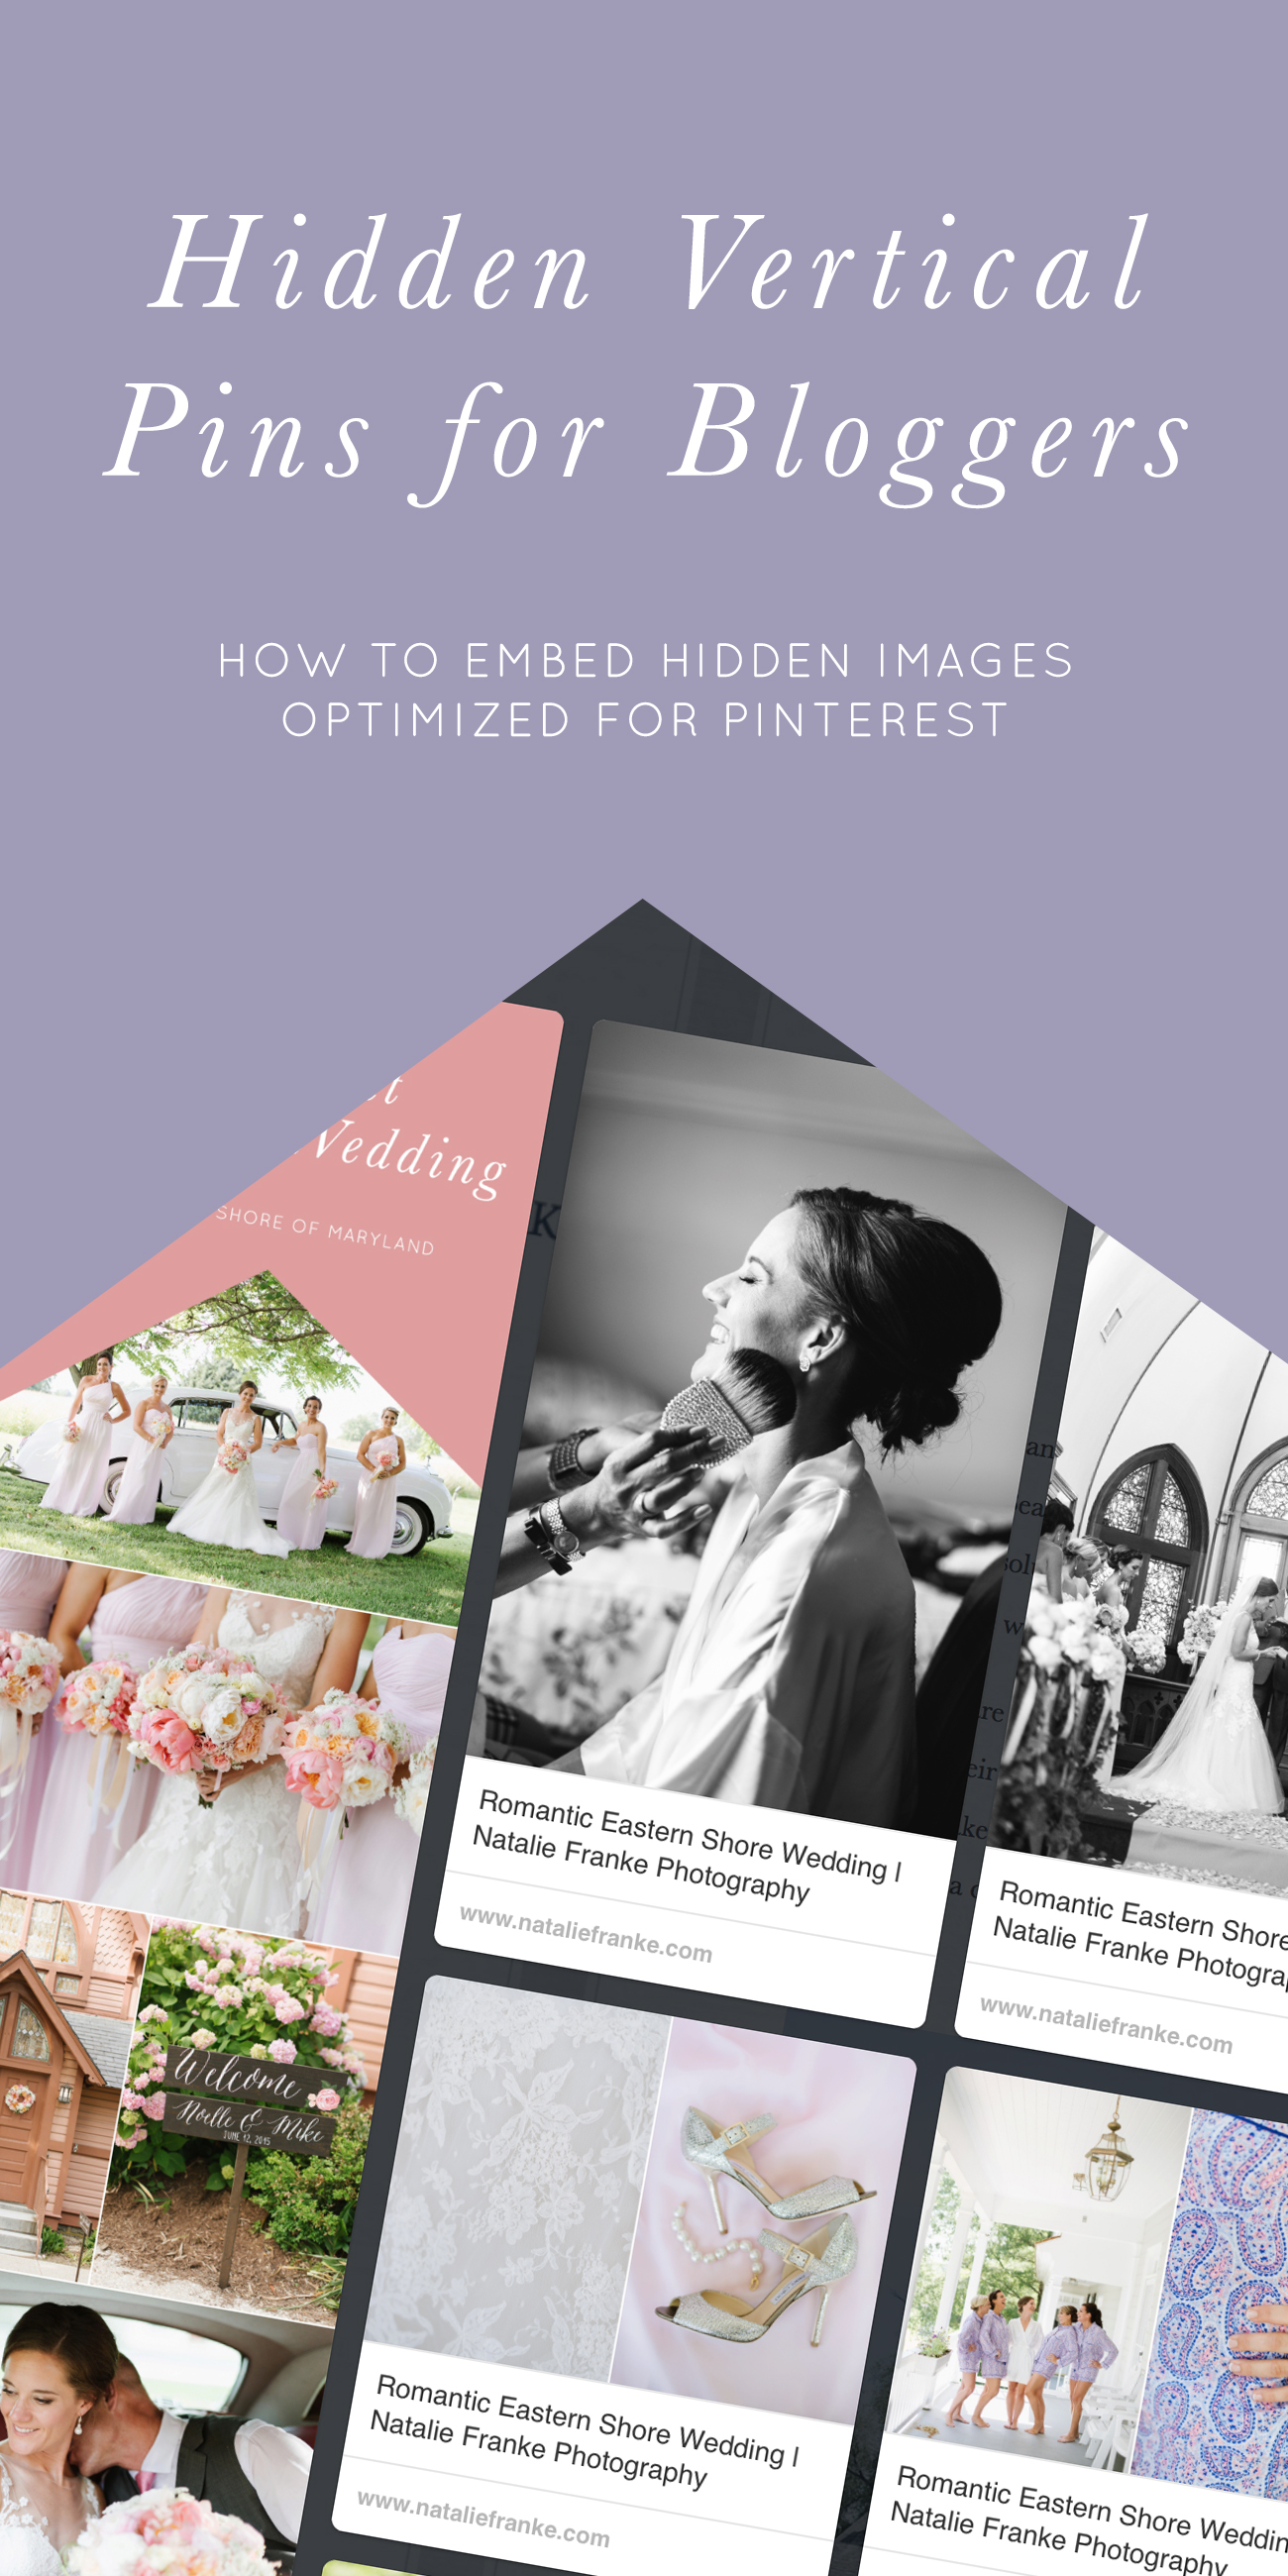
While exploring her favorite food blogs, my sweet friend Alexandra quickly realized that many of her favorite bloggers were somehow embedding “hidden” images in each of their posts that only appeared when you clicked a universal pin-it button on their blog or browser. It’s well known that long vertical images do much better on Pinterest, as they take up more visual space in your stream and result in more re-pins, likes, and comments by standing out from the crowd!
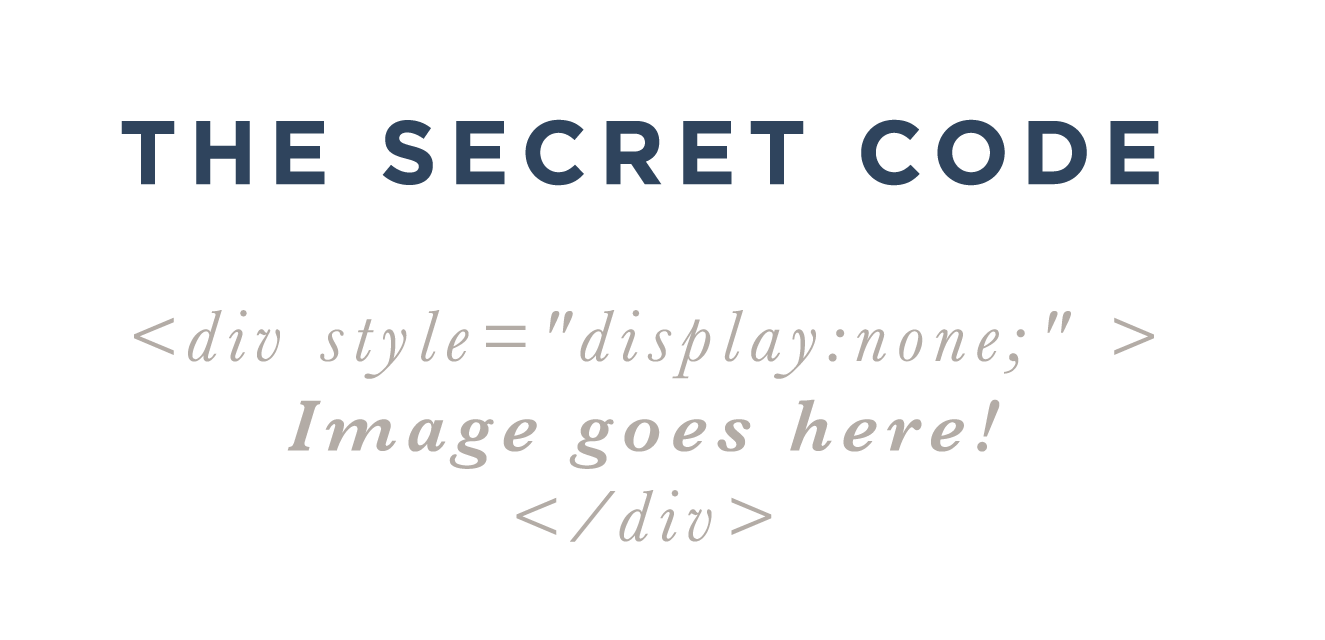
Curious and hoping to discover the secret, Alexandra searched for weeks asking everyone she could about these hidden vertical images until she finally found the trick! A simple bit of code on either side of an image allows you to create and hide long vertical images that appear when a reader clicks the pin-it button to bookmark your post! Absolutely genius, right?
Food bloggers have been embedding long collage-style images with multiple photographs and recipes without actually publishing them in the blog post content for years. Why? While these images are absolutely gorgeous on Pinterest, they look sort of ridiculous when shoved into the content of a blog post and often don’t fit with the flow of post. By embedding these images secretly into the code and making them virtually invisible – Bloggers get the best of both worlds >> A beautiful post that looks exactly as they imagined and the Pinterest potential of an image or graphic going viral!
Why I love Pinterest Optimization for Photographers:
As a photographer, it’s always a challenge when a client sends you their Pinterest board of 1000 images from different weddings, photographers, styles, and lighting conditions. It is creatively exhausting to try to recreate dozens of poses and styled details that someone else already dreamt up and executed while maintaining artistic authenticity. However, I genuinely want my couples to share the types of images that inspire them and see which weddings have been their favorites! By encouraging my brides and grooms to virtually “bookmark” their favorite weddings, details, and poses directly from my blog – I can get a better feel for what they love and can get inspired for their big day without being pressured to recreate another photographer’s work.
By making it as easy as possible for current and potential clients to “pin” your photographs to their inspiration boards,you are opening your work up to a much wider audience which increases the ways in which newcomers can find and fall in love with your images. I’ve also had national publications find my images on Pinterest and ask permission to republish them in round-ups like this Welcome Sign Round-up for Brides Magazine.
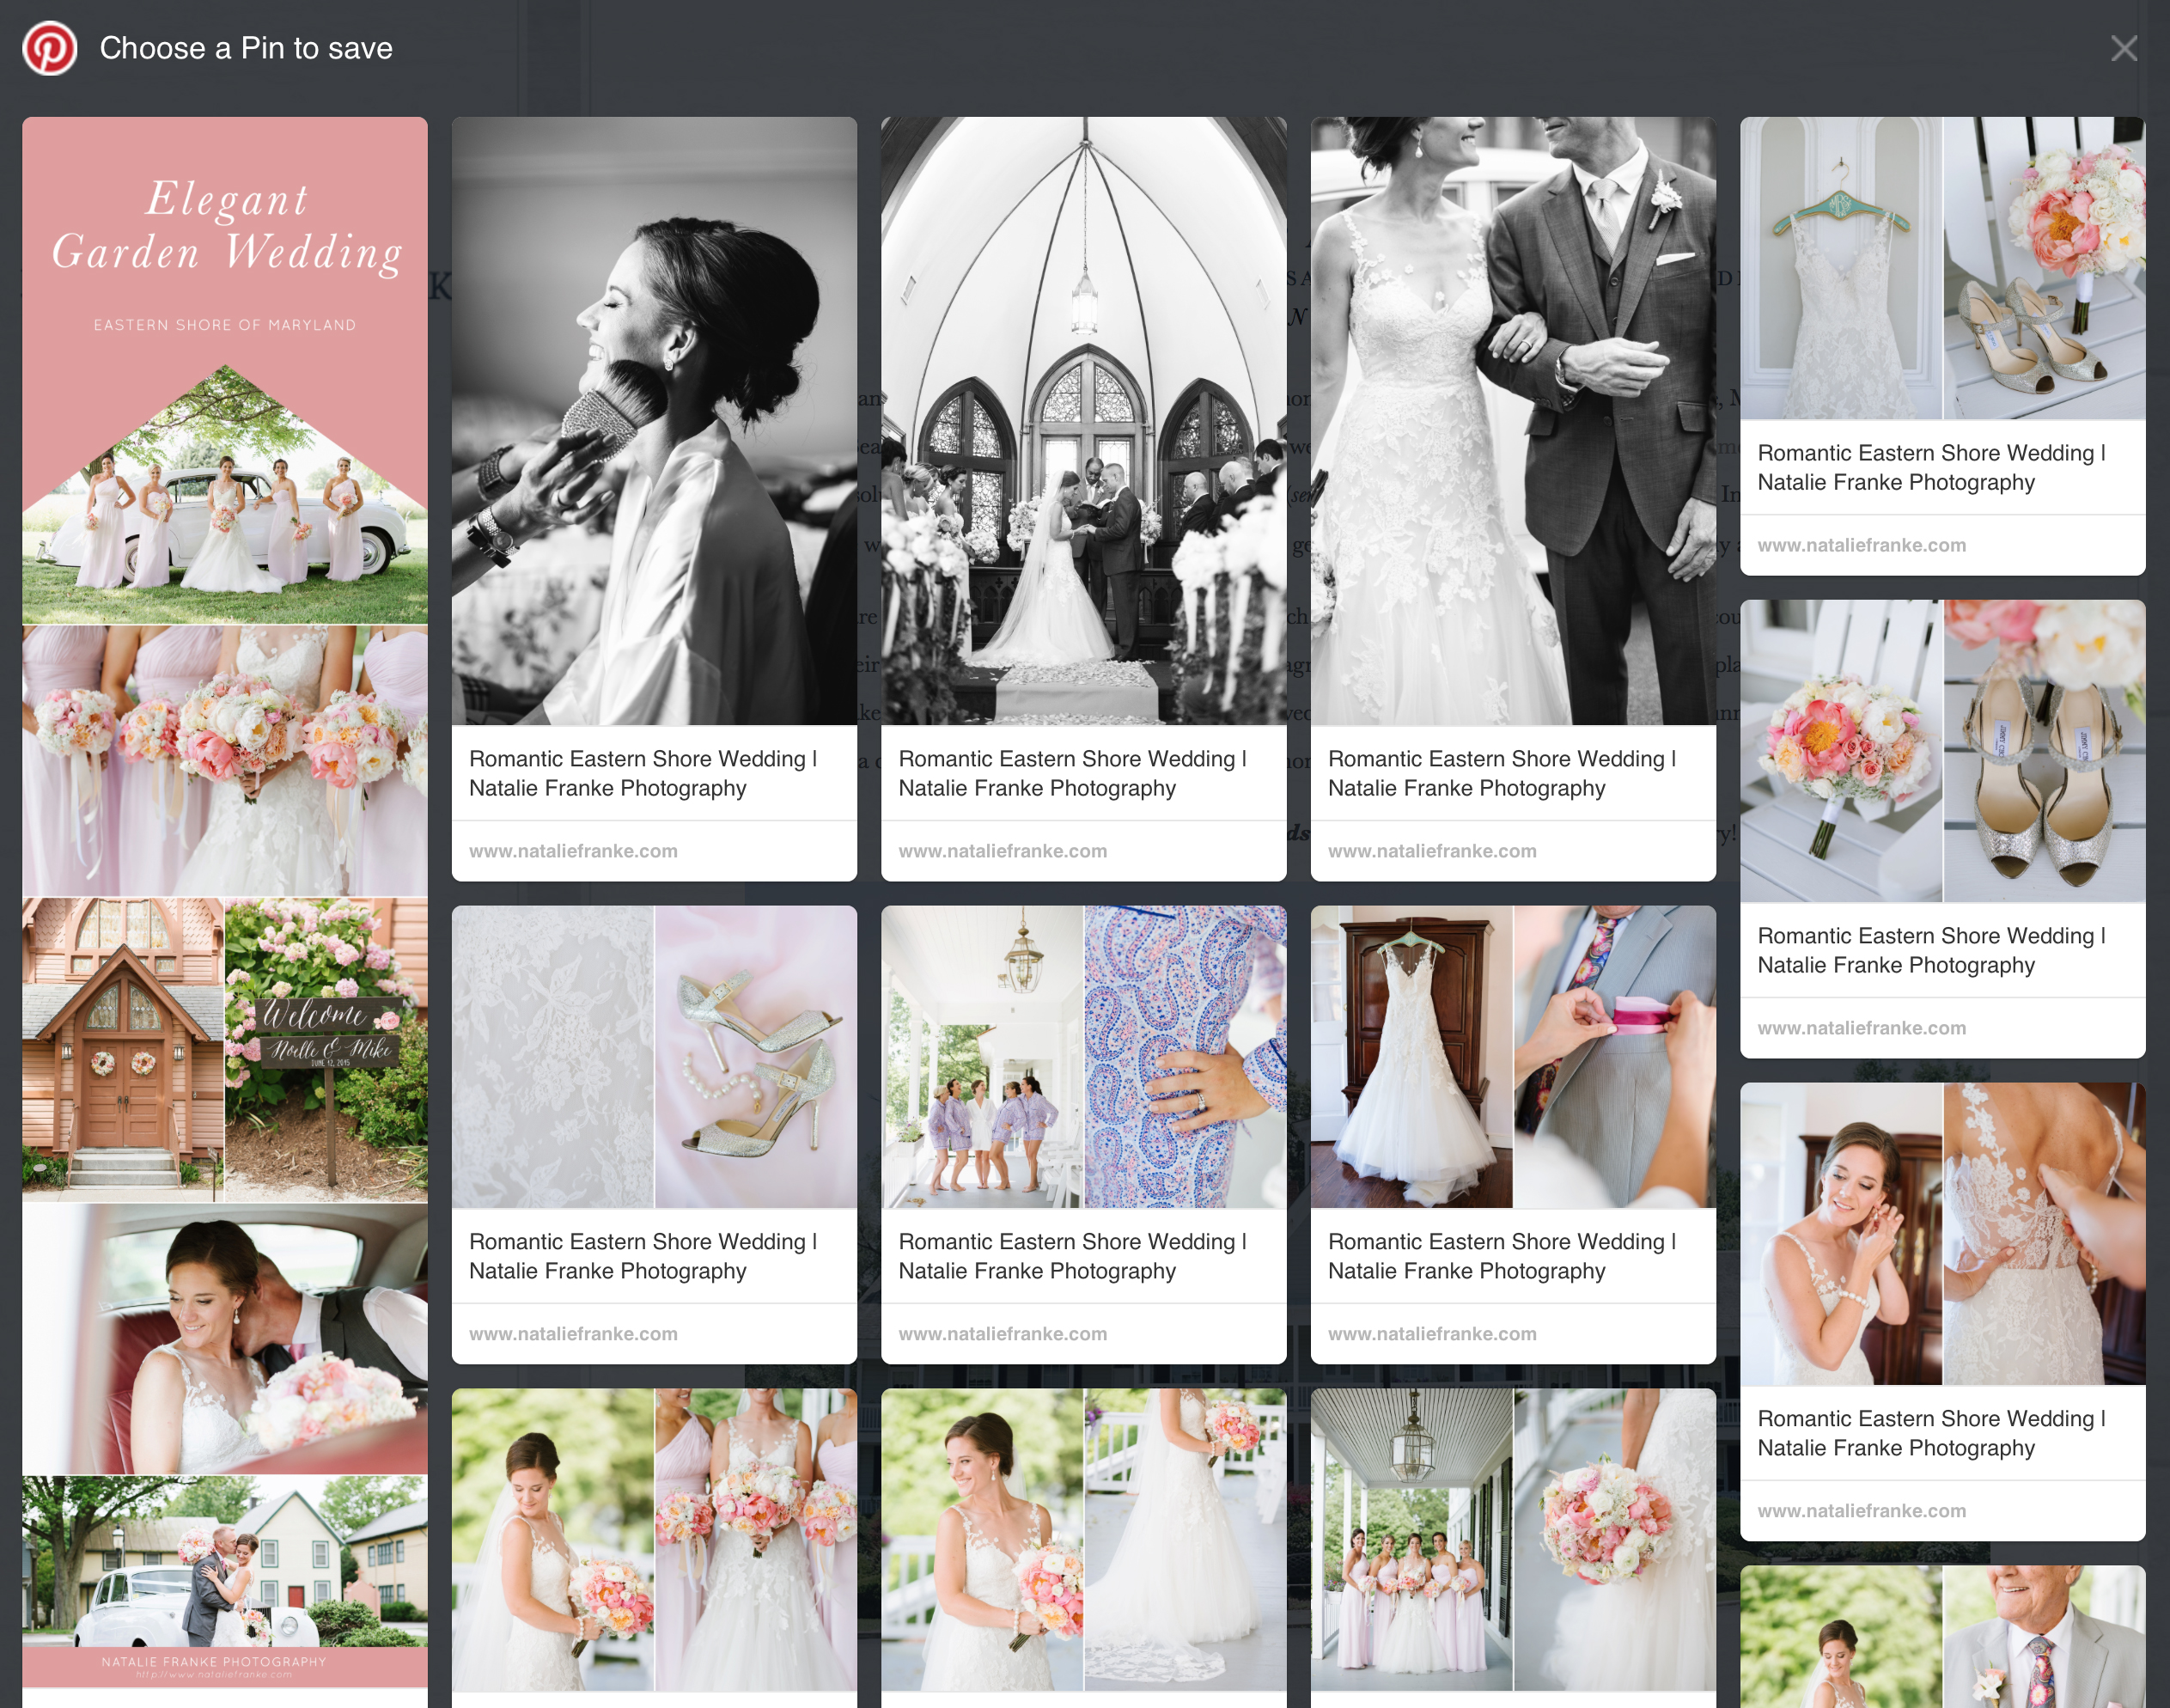
Creative Ways to Use Pinnable Vertical Images:
– Â Long Collages for Weddings to act like a Virtual Bookmark for Current + Potential Clients.
– Â Create strategic graphics for Educational Content, Giveaways, and Announcements that don’t distract from your post.
– Â Highlight Vendors you LOVE on Editorial Shoots with vendor-specific collages of florals, invitation suites, gowns and more.
–  Show Step-by-Step Instructions for DIY Projects, Recipes (for Food Photographers), and Tips for your Wedding + Portrait Clients.
–  Include a Photography Credit with your company name + website address without the need to watermark individual images.
These graphics can be used in so many creative ways and are incredibly simple to create using Blogstomp and/or Photoshop! Food photographers can include recipes alongside their imagery with each post for increased interaction on Pinterest and start a branded recipes board of all of their work. Portrait photographers can do long collage-style pins of outfits they love to inspire future clients and create boards with different looks based on the season (spring, summer, winter, fall).
Visit Natalie Franke Photography’s profile on Pinterest.
Follow Heart Love Always’s board Blogging & Business Tips for Creative Entrepreneurs on Pinterest.
July 14th, 2015 at 7:53 am
Love this secret 🙂 Thanks!
July 14th, 2015 at 8:27 am
I use pinterest alot and this is a great advice. Many useful information, thanks!
July 14th, 2015 at 8:30 am
I love this! I need to start utilizing Pinterest more and this is a great secret to have.
July 14th, 2015 at 8:40 am
Your creative genius and drive as a businesswoman constantly astounds me. I want to live in your shadow, draw close to your red-hot fire, and be your biggest and loudest cheerleader. And hope that maybe, just maybe, one day I can be as cool as you are. xoxo
July 14th, 2015 at 8:46 am
This is brilliant, Natalie!! Thanks for sharing the video with the step-by-step instructions!!!!
July 14th, 2015 at 8:46 am
Um, this is the best thing ever! THANK YOU!
July 14th, 2015 at 9:02 am
NAT!!! Seriously LOVE LOVE this!!! So thankful for your sweet insight! <3 <3
July 14th, 2015 at 9:11 am
Thanks for the tip! I’ll definitely be giving that one a try some time! Thanks for sharing!
July 14th, 2015 at 9:16 am
this is so awesome! cannot wait to start using this ASAP!
July 14th, 2015 at 9:33 am
Oh now this is INCREDIBLE!!!!!
July 14th, 2015 at 9:37 am
This was incredible!!! Can’t wait to start using this!!!! ;D
Could you possibly include that code in text format? I don’t want to mess up the coding.
July 14th, 2015 at 9:54 am
If I write that code out in text and put it in the blog… it will be invisible! 😉
July 14th, 2015 at 9:38 am
OMG I love you for sharing this! This is AWESOME!
July 14th, 2015 at 10:54 am
You’re AMAZING!!! I love this Nat!!! 🙂
July 14th, 2015 at 12:07 pm
AMAZING! I need to try this!! Thanks so much for sharing Nat!!
July 14th, 2015 at 2:11 pm
Amazing advice, Natalie!!!! Oh my gosh, can’t wait to start doing this!
July 14th, 2015 at 3:22 pm
So, I’m super new to blogging (I do love Pinterest, though). I guess, I’m not sure why you’d want to do this. I know I’m missing something. 🙂 I figured when you post a blog post, you want to always include images in it (I’m a photographer), so the purpose of including hidden images eludes me. Can someone help a blogging newbie here? I’d love to know why this is a good idea 🙂 Thanks a bunch!
July 14th, 2015 at 4:03 pm
Hey Ester! I hope I can help to explain this a little better – Long vertical images and graphics are significantly more successful on Pinterest, however including “mile long” verticals in the body of your blog post itself aren’t visually appealing. As a photographer, it’s likely that you’re blogging single images alongside your text, like I do, but these horizontally oriented frames do poorly on Pinterest when pinned by your clients, potential clients, or other professionals. If you’re interested in optimizing your blog content to make it more Pinterest-Friendly (without actually including those incredibly long graphics in the post itself) this is a simple solution! Food photographer + bloggers have been using this technique for years and it results in a LARGE amount of re-pins thereby increasing the likelihood of your images being found on the platform! I’ve been including these larger graphics behind the scenes for a few weeks now and have seen my Pinterest traffic to the blog nearly double! It’s just a simple way to increase the number of potential people who will see your work and fall in love with your images!
July 16th, 2015 at 5:01 pm
I love this idea! But I’ve noticed that the hidden images all still show up in a blog post if you read it in an RSS reader like Feedly. Have you heard about any way to make them hidden there also?
July 16th, 2015 at 9:28 pm
Kelly – Not yet! 🙂 Although I will keep you posted if anything changes!
July 21st, 2015 at 6:41 pm
This is a great secret. Thanks for sharing!
July 24th, 2015 at 4:22 am
An awesome little tip thank you 🙂
July 29th, 2015 at 12:21 pm
I am on blogger as I haven’t migrated to WP yet, does this work for that too? I have been wondering how to do this for ages and it is so good to know how to do it, thank you for sharing 🙂
July 29th, 2015 at 8:25 pm
It’s HTML, so I would assume it works for any blog that uses HTML!
August 24th, 2015 at 2:49 pm
Thank you so much! I’ve been searching for how to do this forever. I can’t believe how simple and easy it is to do!
Thanks again.
August 26th, 2015 at 8:08 am
This secret is AMAZING!! 🙂
August 26th, 2015 at 8:21 am
You always have such great content! I need to start implementing this:)
August 26th, 2015 at 8:43 am
This is great information!!! Definitely need to start using Pinterest to my advantage more! Thank you for sharing!
August 26th, 2015 at 8:47 am
Natalie, this is truly a gem. I’ve been trying to step my Pinterest game up and I think this will be my starting point!
August 26th, 2015 at 9:06 am
Love that you share so freely! This is a totally amazing “secret” 🙂
August 26th, 2015 at 9:17 am
So incredibly brilliant. Thanks so much for sharing this!
August 26th, 2015 at 9:25 am
This is BRILLIANT! I always stuck a random vertical image at the bottom of my post for this reason, but hiding it is so smart!
August 26th, 2015 at 9:26 am
Soooo good. Love a good secrete recipe. I’ll have to pass this along to my website designer. Thank u!
August 26th, 2015 at 9:28 am
Amazing!! I’ve been needing to step up my Pinterest game and this is so helpful!
August 26th, 2015 at 11:28 am
Oh my gosh! This is genius! I never even thought about this!
August 26th, 2015 at 11:39 am
Super important – thanks for the tutorial!
September 14th, 2015 at 4:52 pm
Natalie! I know this has been here for a while, but I finally got the chance to try it and it WORKED! Thanks for the pro-tip. Hope you are well, friend! <3
September 21st, 2015 at 11:43 pm
Natalie! BOOM! Girl, this was AMAZING! Loved how simple you made it & that you showcased the awesome ways you can use this tip to increase your reach on pinterest (& therefore drive traffic)! Killin’ it lady xoxo
October 20th, 2015 at 5:35 am
This is great! Thanks for sharing 🙂
October 21st, 2015 at 11:30 am
Great tutorial, this is awesome! Can you recommend an image size for those using Photoshop instead of BlogStomp?
Thanks!
November 9th, 2015 at 10:29 pm
Wow this is amazing! Thank you so much for sharing this with everyone! I’m going to try this on my blog right now.
November 11th, 2015 at 6:26 am
This is a great tip! Thanks for sharing Natalie!
November 19th, 2015 at 10:00 pm
Great information here. I didn’t know about that code until now. Thanks for sharing it. Keep up the great work and live unstoppable!
November 20th, 2015 at 8:30 pm
Wow this is awesome!!! This changed my blogging game forever. Thank you so much for sharing!
March 5th, 2016 at 4:30 pm
This is great, thanks so much!
March 9th, 2016 at 3:14 am
[…] The Pinterest Secret Every Blogger Should Know […]
March 28th, 2016 at 5:35 pm
Wow, I love this. I just tried it out and it works wonders on my Pinterest page. Thank you so much for sharing! You also gave a lot of great tips on Pinterest Using in general that make it a lot easier for me as a blog newbie. Thanks!
April 11th, 2016 at 1:35 am
[…] the secret code. Don’t want a pinnable image in a post? You can hide them, did you know […]
April 15th, 2016 at 9:29 pm
Hey, do you know any other photoshop applications that you can use to make photos vertical? Nice post
April 29th, 2016 at 10:14 am
This is wonderful + super helpful! I was just curious if you’ve heard of CoSchedule? You can schedule your pins out according to the best times automatically! So cool.
May 7th, 2016 at 1:39 pm
Thank you, I’m just getting into using Pinterest for my blog, and this secret is super helpful!
May 29th, 2016 at 2:10 am
[…] Find the original post at nataliefrank.com […]
June 10th, 2016 at 12:40 pm
Oh, YES! I’ve been wondering about the vertical photos forever, and it turns out to be such a simple solution. Thanks so much for sharing! Very nice 🙂
June 14th, 2016 at 3:19 pm
You’ve rocked my world. Thanks for this!
July 13th, 2016 at 3:49 pm
Thanks so much! I will be using this tip from now on… 🙂
Elizabeth
http://www.elizabethkatharine.com
August 21st, 2016 at 8:27 pm
Ahhhmazing!!! I am so happy I saw this shared in one of my blogging groups!!! You have just made my site so pretty with this simple trick! The only thing I found is going back over old posts to update with the code you have to remove and add the long photo back (for some reason the code didn’t take on the original!) but I don’t mind spending 5 minutes to fix it!!! Thanks again for sharing!
November 7th, 2016 at 12:23 pm
[…] The Pinterest Secret Bloggers Don’t Want You to Know […]
November 12th, 2016 at 7:29 pm
Thanks so much! I was just wondering how to do this!!!
January 31st, 2017 at 2:17 am
Going to try.
Loved it.
Thanks so much.
May 17th, 2017 at 12:50 pm
[…] The Pinterest secret every blogger needs to know (spoiler: it’s how to hide mahoosive images). […]
July 10th, 2017 at 7:33 pm
Thanks so much for this!
July 14th, 2017 at 12:35 pm
I am so incredibly thankful for this. Thank you thank you thank youuuuuuu
August 25th, 2017 at 7:10 am
Hi There – thanks so much for this! Do you know however how to do the same on squarespace? Thanks!
January 24th, 2019 at 6:10 am
Natalie!
Love this! For some reason I can’t get this code to work within my blog though. Do you by chance know if ShowIt has certain parameters set that would prevent this? Like perhaps I need to upgrade my account or something?
Thanks!
Ashley